
401 Unauthorized Error: What It Is & How to Fix It

401 Unauthorized is the internet equivalent of a “Restricted Entry” sign at a posh nightclub. Sure, it may help you keep away some unsavory visitors. But it can also turn away legitimate customers while making you look like a snob.
Worse still, 401 errors are often caused by reasons that have nothing to do with the visitor, making them extra frustrating to encounter. But not to worry! Here are a few simple steps you can take as a website owner to troubleshoot the 401 error before it starts impacting your website’s trust.
What is the 401 Unauthorized Error?
HTTP 401 Unauthorized is a status code meaning a request failed because it lacks valid authentication credentials for the requested resource. The server sends it with a WWW-Authenticate response header that names the authentication scheme it expects. To fix it, re-enter your credentials, clear stale cookies, or check the server’s authentication configuration.
What that actually means: 401 Unauthorized is an authentication error, which means the page you are trying to visit is password-protected and your browser hasn’t supplied valid login credentials. This can happen when the user enters a wrong password or when the browser fails to send valid credentials at all.
Of course, 401 errors can also be false positives, meaning that the error can occur even when the visitor has the right credentials to log into a website. It may even occur when the web page isn’t supposed to be password-protected at all. For example, it can be caused by a jittery firewall, a troublesome plugin, or an uncooperative extension added to your website.
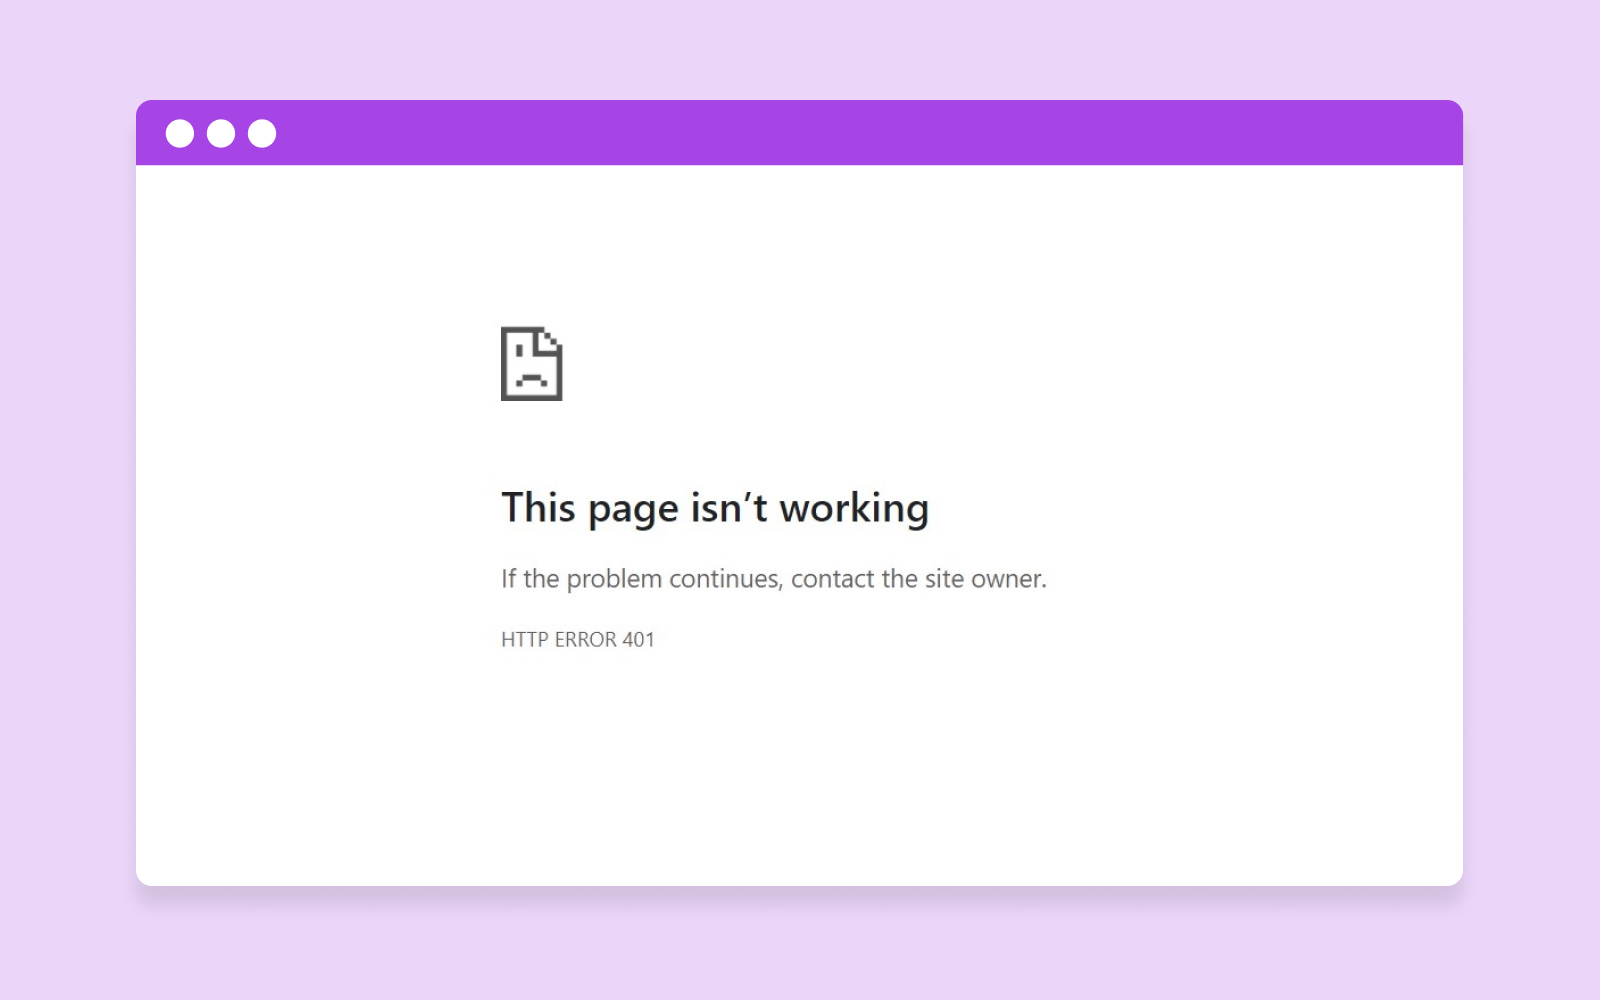
You may notice the 401 error as one of these messages popping up in your browser window:
- 401 Authorization Required
- 401 Unauthorized
- HTTP 401 Error – Unauthorized
- Access Denied
- HTTP Error 401
401 vs. 403 vs. 407: which error do you actually have?
Before troubleshooting, confirm you’re looking at a real 401 and not one of its neighbors. The short version: a 401 means the server doesn’t know who you are, while a 403 means it knows exactly who you are, and the answer is still no. Per MDN’s 403 reference, “authenticating or re-authenticating makes no difference” for a 403.
One trap worth naming: if you’re behind a corporate proxy or VPN, an authentication prompt may be a 407 from the proxy, not a 401 from the website. Check the status code in your browser’s developer tools before blaming the site.
What causes a 401 unauthorized error?
401 errors occur when a web browser has trouble authenticating the visitor’s login credentials with the website’s server. Here are a few common reasons why that might happen:
- Error or typo in the website’s URL.
- Outdated cookies or browser cache.
- IP address restrictions on site access.
- Errors in server configuration.
- Incompatible plugin or website theme.
- Incorrect login attempts by the user.
401 errors are normally client-side errors, meaning they can often be fixed by clearing your browser’s cookies or inputting the correct password. However, server-side issues like plugins and firewalls can also cause these errors, making it very important for site admins to be aware of potential conflicts.
But these are all surface-level explanations. If you want to know what causes a 401 error, you must understand how authentication works in web development.
When a client (i.e., a web browser) requests access to a protected resource on a website, the website will need the client to provide some form of valid authentication. These credentials could be in the form of API keys, a username and password, digital certificates, or something else, depending on the authentication scheme used by the site.
The website then processes the authentication credentials to verify their validity. This could involve checking the credentials against a stored database of users and passwords, contacting an external authentication provider, or performing some other form of validation.
If the authentication is successful, it returns a 200 status code, and the website will generate a session token for the client. This identifies the authenticated client and tracks the client’s interactions within the website. The session token is often stored in a cookie in the client’s browser or as a header in any subsequent requests.
However, if the authentication is unsuccessful, the website will return an HTTP error message, such as the 401 error code. The 401 error message typically includes a WWW-Authenticate header, which explains how to authenticate with the server in the user’s browser. This header can include more context about the 401 error, such as the type of authentication required (e.g., Basic, Digest, or OAuth).
How to fix the 401 unauthorized error
401 access control errors are pretty common when logging into a membership site or accessing a protected web page. Luckily, they are also very easy to fix most of the time. Here are a few things you can do to address this error, both as a website visitor and a web administrator:
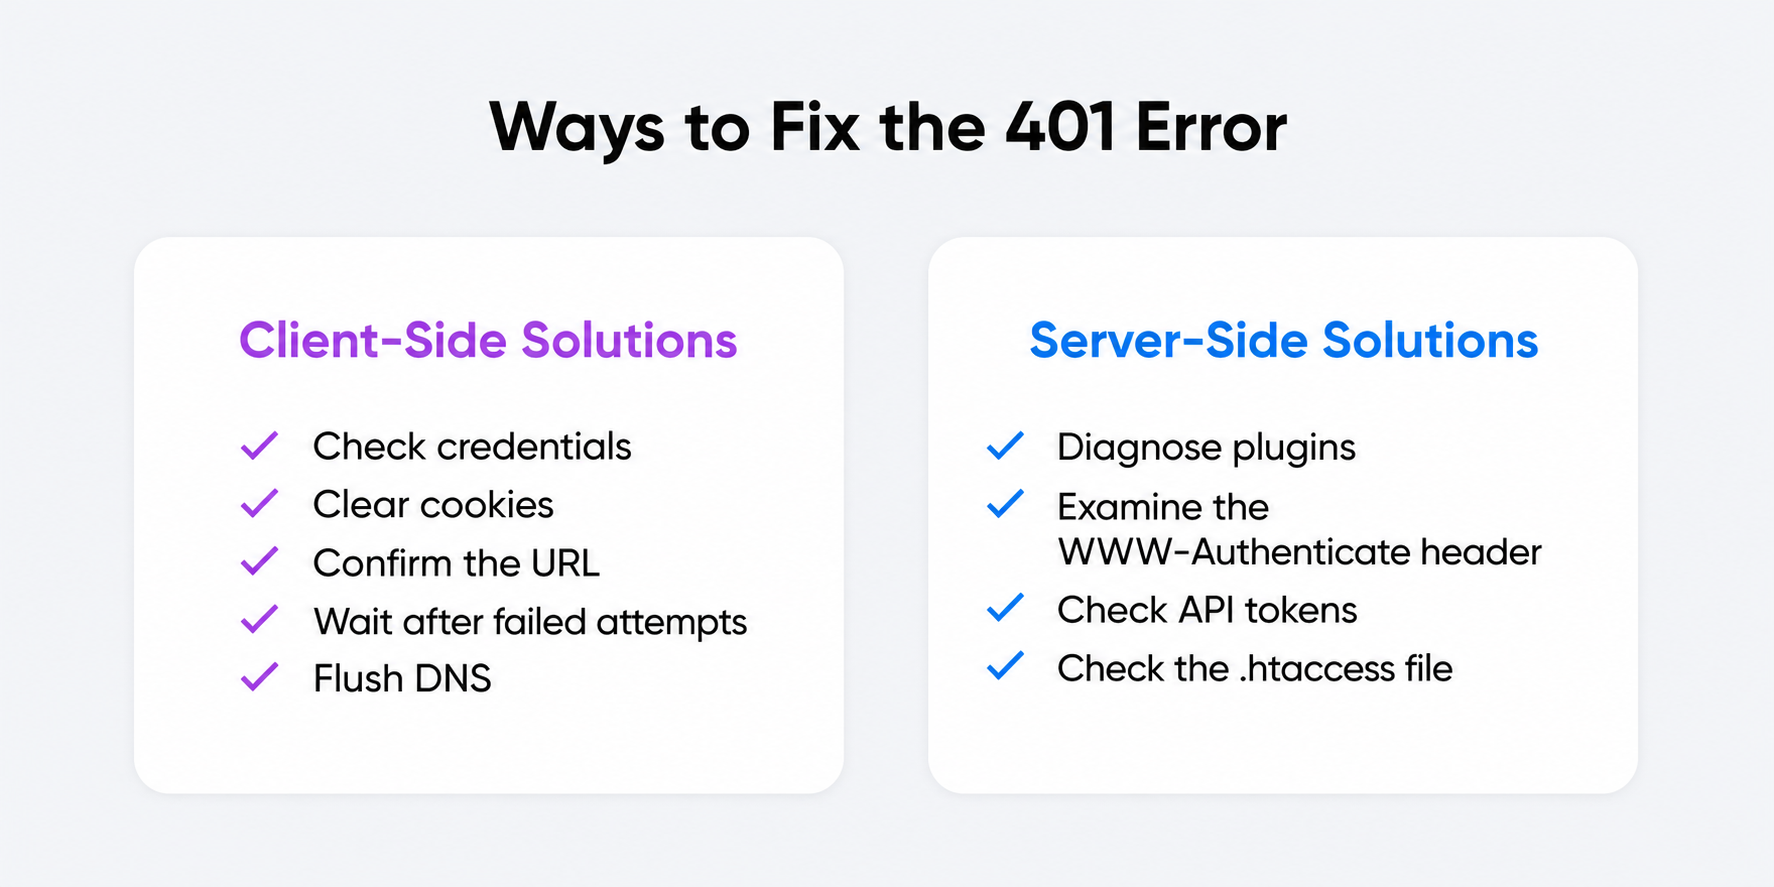
Client-side solutions
401 error pages are sometimes caused by client-side issues like login credentials or even the web browser used to access your website’s password protection system. These can be fixed with a few simple steps from the visitor’s end:
- Check User Credentials: Make sure you entered the correct username and password combination. Double-check your authentication credentials for the slightest typo. Remember, usernames and passwords are case-sensitive.
- Clear Browser Cookies: If the website uses cookies for authentication, the error may be because of invalid or expired cookies. Normally, cookies have an expiration date or just expire when the browser is closed. If you’re having trouble accessing a website, clear browsing data by following the instructions for your specific web browser to help solve the issue.
Cookies
Cookies are pieces of data sent to a user’s computer or mobile device by a web server. They are then stored on the user’s device. Cookies can be used for authentication, identification of a user session, personalization of web content, or collecting information about the use of a website.
Read More
- Verify URL: Make sure the URL you’re trying to access is correct and up to date. A mistyped URL usually returns a 404, but a URL that points into a password-protected area of a site can return a 401. If you’re following a link from another website, it’s quite possible that the link is using the wrong URL.
- Too Many Attempts: Some sites temporarily lock logins after repeated failed attempts, so wait a few minutes before retrying. True rate limiting has its own status code, though — per MDN, servers signal it with a 429 Too Many Requests response, not a 401.

DNS flushing
What is DNS?
The Domain Name System (DNS) protocol keeps records of which domain names correspond to specific IP addresses. This system enables you to browse the web by typing in regular URLs instead of IP addresses.
Read More
DNS caches help improve loading speed and website performance when browsing the internet, but stale or outdated entries can send your browser to the wrong (or an old) server, which can respond with unexpected errors. Flushing (clearing) your DNS cache is a quick, harmless way to rule this out, and it can be done a few different ways:
Windows: To flush your DNS on Windows 10/11, follow these steps:
- Open the Command Prompt by pressing Windows+R and typing “cmd” (without quotes) into the Run dialog box.
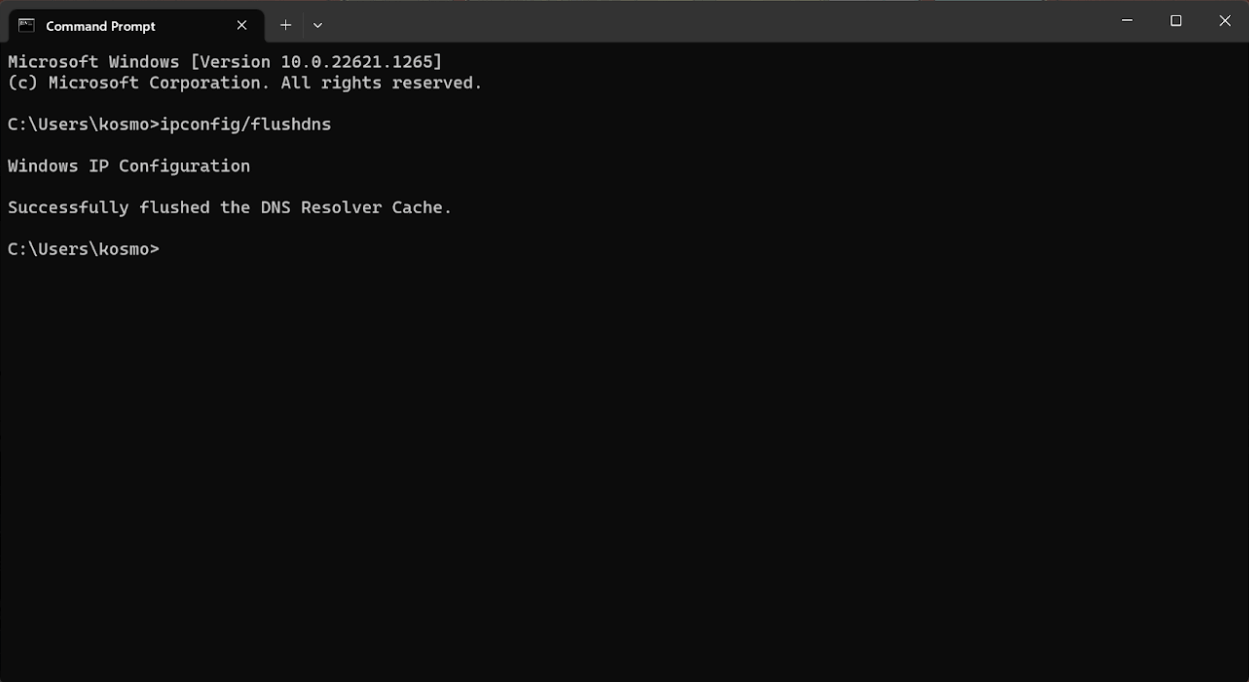
- Now type in the command “ipconfig/flushdns” inside Command Prompt.
- If you are a Windows PowerShell user, you can do this by opening PowerShell and typing in “Clear-DnsClientCache” (without quotes).
- This will flush the DNS and clear all the records from the local DNS cache.
macOS: If you’re using a MacBook or iMac, you can flush your DNS cache using Terminal.
- Open Terminal on your Mac by using Spotlight Search or pressing Command+Space and typing Terminal into the search box.
- Inside Terminal, type in “sudo dscacheutil -flushcache;sudo killall -HUP mDNSResponder” (without quotes).
- Your DNS cache has now been flushed on your Apple computer.
Google Chrome: If you’re using Google Chrome, the browser has its own DNS cache that’s independent of the operating system (Windows or Mac). To clear Chrome’s DNS cache:
- Type “chrome://net-internals/#dns” into the address bar.
- Now, click on the “Clear host cache” button to clear your DNS records.
Server-side solutions
If the visitor’s credentials and browser check out, the problem lives on your server. Work through these checks in order.
Fixing a 401 error caused by WordPress plugins
Plugins are a staple for WordPress websites, but they can sometimes also cause errors if configured improperly. This can happen when the plugin contains code that creates a website security issue or conflicts with the platform’s core functionality.
So, what can a site admin do to fix this issue? Well, the first step is to identify which plugin or plugins are causing the issue. Usually, this can be done by disabling each plugin one by one and checking if the error still appears. Once the plugin causing the issue is identified, you can either update, reconfigure, or permanently remove it. Common culprits may include:
- CDN services like Cloudflare and KeyCDN.
- Web firewalls like Sucuri and Wordfence.
- Poorly built WordPress themes.
Follow these simple steps to enable or disable plugins on your WordPress site:
- First, log in to your WordPress dashboard.
- Click on the “Plugins” option in the left-hand menu.
- Find the plugin you want to enable or disable and click on the “Activate” or “Deactivate” button below the plugin name.
- If you want to disable multiple plugins at once, check the box next to each plugin and select “Deactivate” from the “Bulk Actions” drop-down menu.
- If you want to enable multiple plugins at once, check the box next to each plugin and select “Activate” from the “Bulk Actions” drop-down menu.
In some cases, it is also possible to fix the issue by disabling or reconfiguring specific settings within a plugin. For example, if your website uses a caching plugin, it’s worth trying to clear the cache and check if the error still appears.
In a few rare cases, 401 errors can result from a server error. You can find out more about this by looking at your WWW-Authenticate Header.
The WWW-Authenticate Header is a response header sent by the server that contains information on the authentication methods supported by the site. This header helps the user’s browser decide which authentication protocol to use when requesting data from the server.
The header is also used to send additional information about the authentication process. This may include the domain being protected by the authentication scheme, or the algorithm used by the server.
Here’s what the exchange looks like on the wire, using the example from MDN’s 401 reference:
GET /admin HTTP/1.1
Host: example.com
HTTP/1.1 401 Unauthorized
Date: Tue, 02 Jul 2024 12:18:47 GMT
WWW-Authenticate: Bearer
Reading it line by line: the client asks for /admin without sending any credentials. The server answers 401 and uses WWW-Authenticate: Bearer to say “this resource needs a bearer token.” Resend the request with a valid Authorization header, and the 401 goes away.
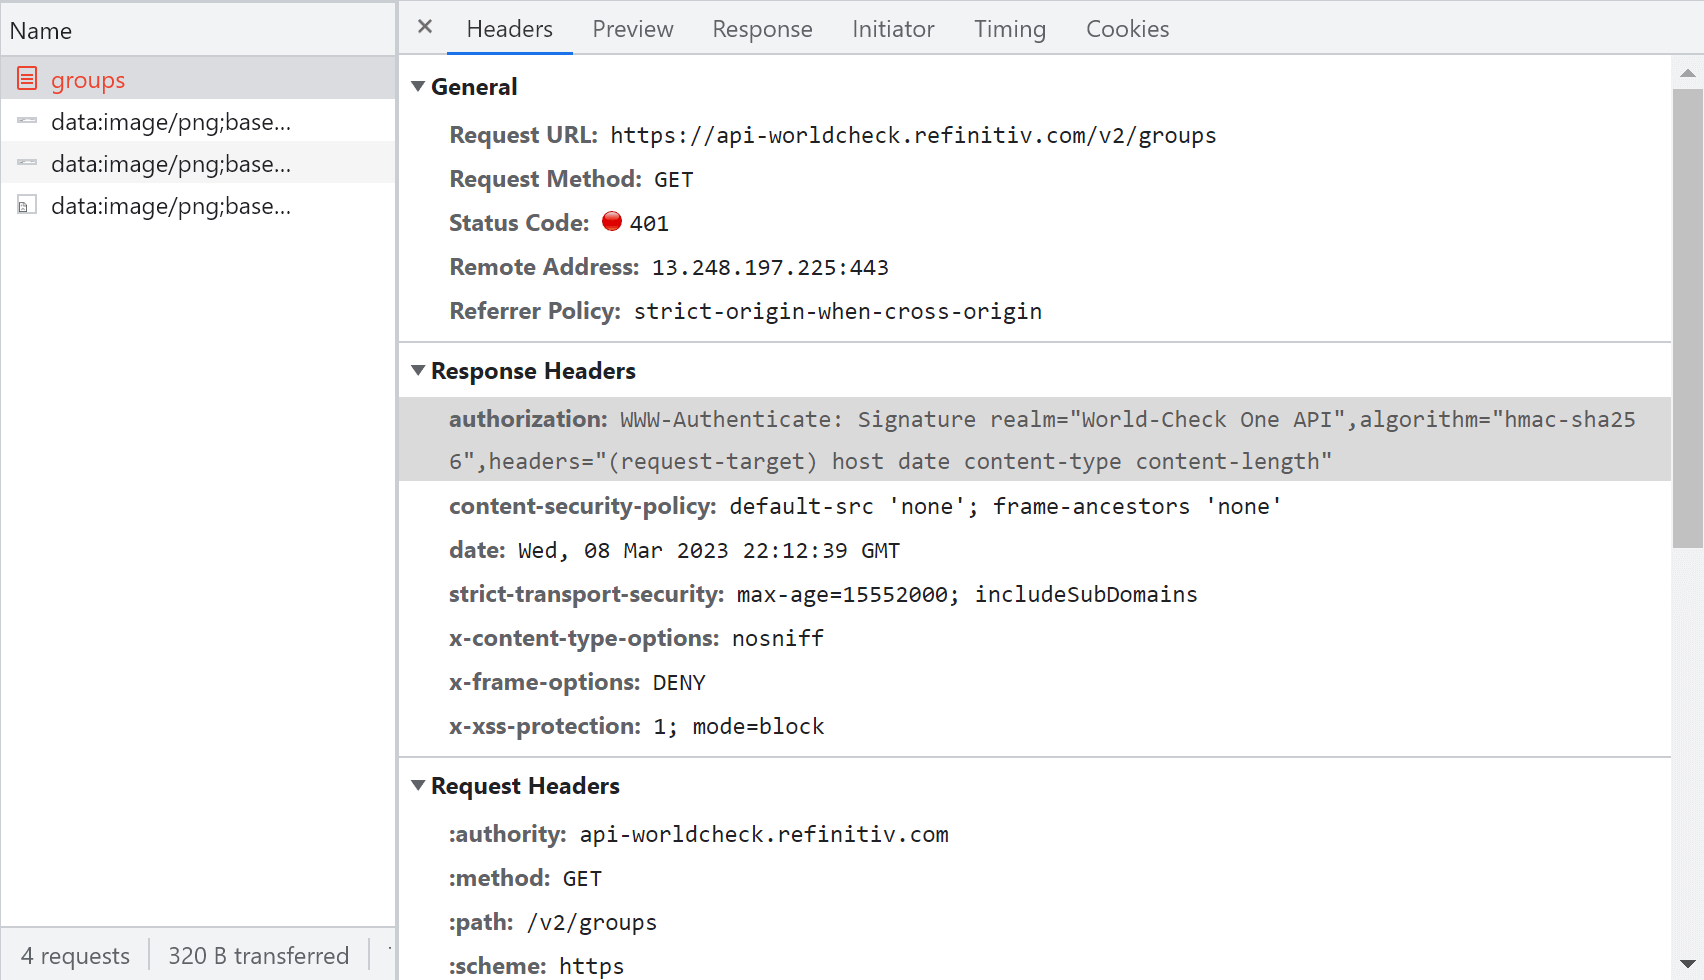
To check the WWW-Authenticate Header, open Chrome, navigate to the URL causing the 401 error, and right-click anywhere on the page. From the drop-down menu, select “Inspect”. This will bring up the Developer Tools window.
Select the Network tab once inside the Developer Tools window. Here, you’ll see all the requests the browser sends when loading the page. If the response from the server contains a WWW-Authenticate header, it will be visible in this tab.
By inspecting the WWW-Authenticate header, you can get a better understanding of the authentication process used by the server. Next, check that the response was sent and identify what authentication scheme was used to send it. That’ll help you narrow down the problem before looking for a specific solution. Here are a few authentication schemes found in the WWW-Authenticate Header, along with descriptions of how they work, for reference:
- Basic: This scheme uses a base64-encoded username and password separated by a colon. This is considered the least secure authentication method and should only be used over HTTPS.
- Digest: This scheme uses a challenge-response protocol to authenticate clients. The server sends a nonce value to the client, which the client uses to create a response based on the username, password, and request information.
- Bearer: This scheme is used for OAuth 2.0 authentication. The client receives a token from the server, which it uses to authenticate subsequent requests.
- Negotiate: This scheme is used for Kerberos authentication.
- AWS4-HMAC-SHA256: This authentication scheme is used to authenticate requests to Amazon Web Services (AWS) using an AWS access key and a secret access key.
Fixing a 401 error from an API or token
Getting the 401 from an API rather than a web page? Suspect the token first. Three checks solve most cases:
- Check expiry and revocation: OAuth 2.0 access tokens expire, and under RFC 6750 an expired or revoked bearer token is rejected with a 401 and an “invalid_token” error code. Refresh the token or request a new one, then retry.
- Verify the Authorization header: credentials must be sent in the format the scheme expects (for Bearer auth, that’s “Authorization: Bearer <token>”). A missing scheme name or stray whitespace is enough to earn a 401.
- Match the scheme: compare your request against the WWW-Authenticate challenge in the 401 response. It names the scheme (and often the realm) the server actually accepts.
.htaccess file
If you’re experiencing a 401 error on your website, one possible cause could be an issue with your .htaccess file. The .htaccess file is a configuration file used by Apache web servers to control access to your website’s directories and files. Here’s how to check your .htaccess file for causes of a 401 error:
- Connect to your website’s server using an FTP client or file manager.
- Navigate to the directory where your .htaccess file is located. This is usually the root directory of your website.
- Download a copy of your .htaccess file to your computer.
- Open the .htaccess file in a text editor (like Notepad++) and look for any lines that specify access controls or authentication requirements. Specifically, you’ll want to look for the following parameters: AuthUserFile, AuthName, AuthType, and Require.
- Check that the access controls or authentication requirements specified in the .htaccess file match the settings you intend to use for your website. For example, if you have recently updated your website’s authentication mechanism (AuthType), you may need to update the corresponding settings in your .htaccess file as well.
- Save the changes to your .htaccess file and upload it back to your website’s server.
- Test your website to see if the 401 error has been resolved.
What a lingering 401 does to your SEO
Here’s the part that makes speed matter: search engine crawlers don’t have your password. If pages that should be public start returning 401 (due to a firewall misfire or staging password protection left switched on), Googlebot gets the same locked door your visitors do. Google only indexes a page after it can crawl and process its content, per Google’s Page indexing report documentation, so a page serving 401s can’t stay eligible for search results.
You do get a grace period. Google notes that when a URL is unavailable, it “will probably continue to try crawling that URL for a while.” Use that window: open the Page indexing report in Search Console, which flags the indexing problems Google hit while crawling your site, and fix any unintended 401 before the retries stop.
HTTP response codes offer little context on their own, which makes them troublesome to navigate without the proper technical assistance. It’s part of the reason why DreamHost offers 24/7 support to help you troubleshoot downtime on your website and domain.
If you’re having trouble diagnosing or fixing a 401 error on your website, you can try contacting your hosting provider for support. It’s also possible to contract a technical expert, such as a web developer, for help with the issue.
401 errors can be jarring for the end user, but they are often an easy fix. If you’re contacted by someone unable to access your website due to this error, walk them through the common client-side solutions before looking into any potential server issues, such as WordPress plugins or the WWW-Authenticate header. If you’re still having trouble, you can always bring in some technical help to diagnose the issue.
FAQs about the 401 unauthorized error
What does “401 – Unauthorized: access is denied due to invalid credentials” mean?
It’s a long-form version of the standard 401 error: the server rejected the request because it lacked valid authentication credentials. Double-check your username and password, clear the site’s cookies, and try again. The message doesn’t mean your account was banned.
Is a 401 error the same as a 403 Forbidden error?
No. A 401 means you aren’t authenticated: credentials are missing or invalid, so logging in correctly can fix it. A 403 means the server knows who you are and still refuses. Per MDN, re-authenticating makes no difference for a 403.
What does 401 Authorization Required mean?
It’s another label some servers use for the same HTTP 401 status: the page is protected, and the server needs valid credentials before it will respond. The fixes are identical: verify the URL, re-enter your credentials, and clear cookies for the site.
Is a 401 error my fault as the visitor?
Not always. Wrong passwords and expired cookies are visitor-side causes, but misconfigured plugins, firewalls, and .htaccess rules on the server can return a 401 even when your credentials are correct. If other people report the same error, the problem is almost certainly server-side.
Do 401 errors hurt SEO?
They can. Search engine crawlers can’t log in, so a public page that returns 401 can’t be crawled or indexed. Unintended 401s surface in Google Search Console’s Page indexing report — fix them quickly to keep affected pages eligible for search results.
Did you enjoy this article?

